
In my last post, I showed you how to do the special cast-on for my Early Morning Mitts pattern. Now it’s time to continue knitting the cuff.
The Finished Cuff
Here’s the finished cuff so you can see what it will look like before we go ahead with today’s tutorial. Notice the garter stitch ridges as well as the gathered stockinette sections in between.

Garter Stitch in-the-Round
To knit garter stitch in-the-round, you don’t knit every round like you would when knitting a flat piece. Instead, you alternate knitting and purling: knit 1 round, purl 1 round, etc. So for my pattern, I’ve used a 5 row (or round) garter stitch for each of the 3 “ridges”. Purl, knit, purl, knit, purl.
Gathered Stitches
For the gathered stitches, you add stitches and then later take them away again. The extra stitches cause the fabric to pucker or gather in places. To do this, I doubled the number of stitches with KFB (knit into both the front and back of stitch). KFB sounds complicated, but is really quite easy! Start knitting a stitch like normal. BUT instead of slipping the stitch off your left needle like usual, you LEAVE the stitch on the left needle and then knit into the back loop of the SAME stitch {and then you can slip it off the left needle}.
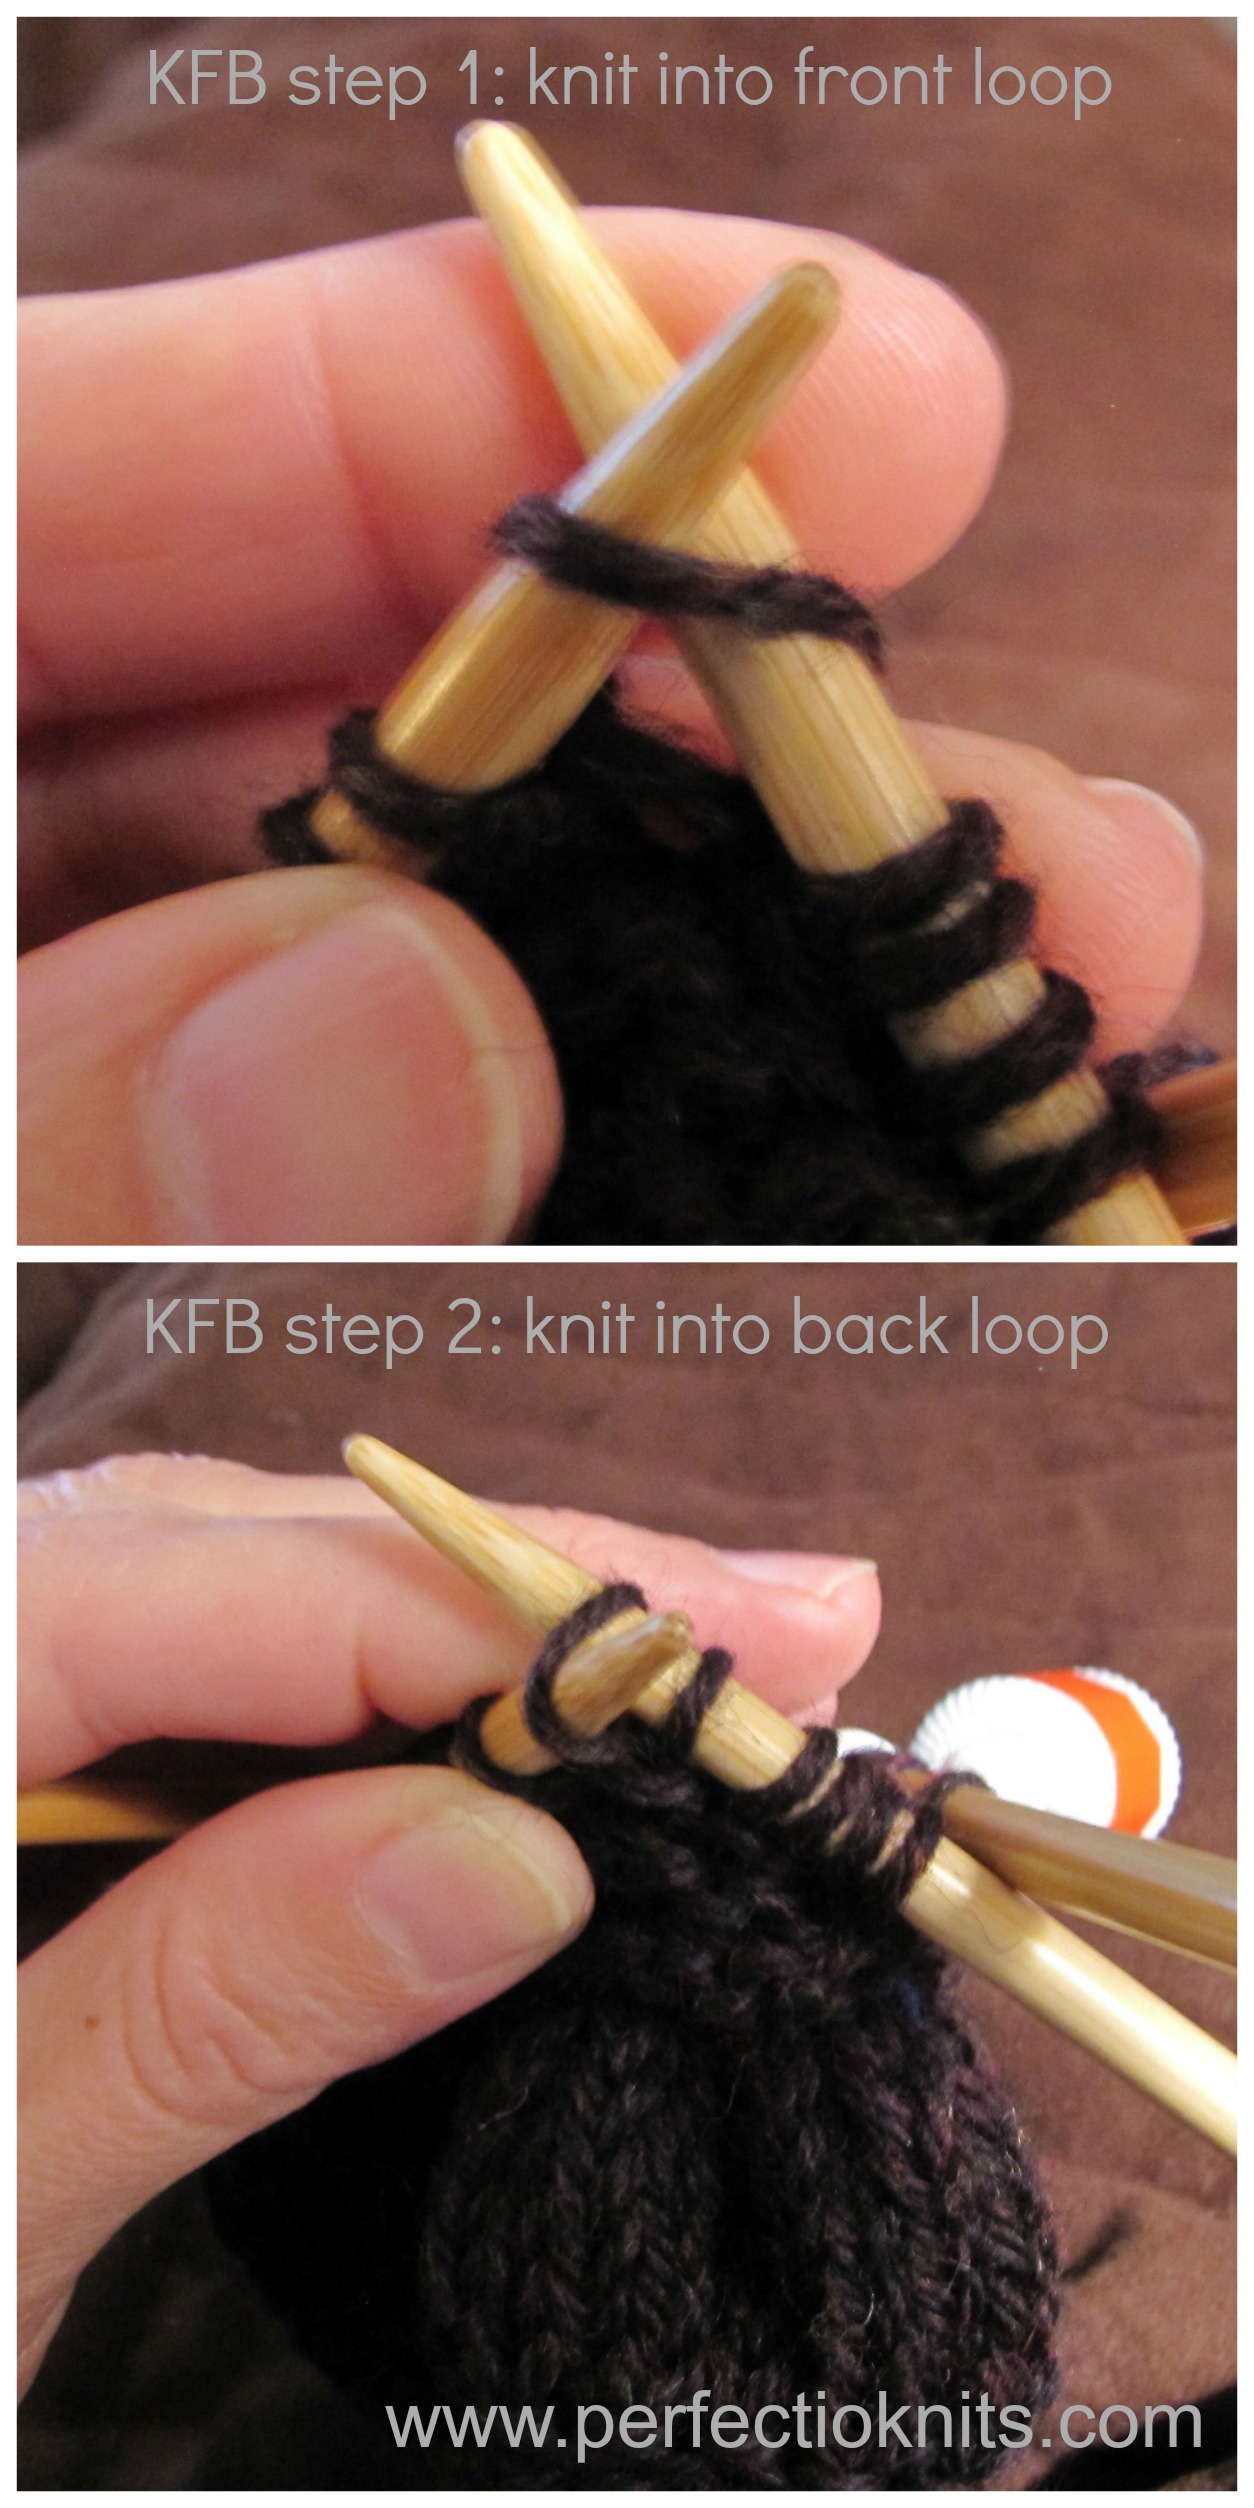 One stitch has now become two! Pretty neat, huh? Once you’ve knit into the front and back of all the stitches, you have a total of 72 stitches.
Knit 5 rounds and then it’s time to decrease those stitches back to the original 36 using k2tog (knit 2 stitches together) all the way around. K2tog also sounds more complicated than it really is. Your right needle goes through the front loops of both the next 2 stitches (from left to right as usual). Knit them together and the two become one!

Shaping for forearm
If you’re making your mitts long like arm-warmers as I am, you may want to consider shaping them with a few well-placed decreases. Here’s how I do this.
While knitting the 2nd round of both the 2nd and 3rd garter stitch ridges, I decrease twice with a k2tog: once in the middle of the round and again at the very end. The first decrease round leaves me with 34 stitches and a second decrease round means I am left with 32 stitches on my needles. [If this seems a little confusing right now, wait until you can see the actual pattern and I think it’ll make sense.]
Once the cuff is knit, it’s time to knit the rest of the way to the wrist. This part of the mitt can be knit as long or short as you like. {Just be sure to make a note of how many rounds you knit so you can do the second mitt the same!}
QUESTIONS? Comments?
Having trouble understanding something in today’s tutorial? Leave a comment below with your question and I’ll answer it in a future post!
Coming up next…the thumb gusset!
In the next post, I’ll show you how to add a thumb gusset to your mitts.
Happy knitting!


Whoa, way over my head =) Can’t wait to see your pattern and learn more so I “get” how to do what you’re talking about!
LikeLike
I’d love to learn how to knit some day (soon). I think it would be great to be able to at least knit our own socks, sweaters and scarves 🙂
LikeLike